This Wooden Spoon Angel Craft takes a wooden spoon, gold fabric and basic craft supplies to produce a family heirloom that will be brought out proudly year after year! We've left edges raw and unfinished, used very simple stitching in places but also used glue and an elastic band - and it all adds to the charm and makes this angel "doable" by even young children.
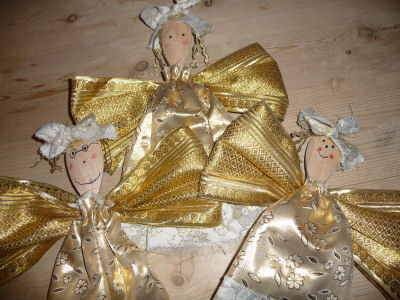
Wooden spoon angels - mine, Tilly's and Josh's angel !
You will need:
A wooden spoon
1 or 2 pieces of fabric for the dress
1 piece of tulle, netting or lace for the underskirt
Wide ribbon for the wings (we used some beautiful sari braid; wired ribbon would also work well)
Scraps of wool, braid or cord for the hair (we used gold ricrac braid)
Ribbon or more cloth for the hair ribbon
Elastic band
Needle and thread
PVA glue or a glue gun
Felt tip pens
Red or pink colouring pencil
Instructions:
1. Measuring and cutting your fabrics:
Measure the length of your wooden spoon. Multiply by 1.5. This measurement is A.
Measure from the "neck" of your wooden spoon to the end of the handle. Add 1 inch. This measurement is B.
Measure from the "neck" of your wooden spoon to the end of the handle. Add 2 inches. This measurement is C.
Our angel's dress has three layers : a gold design a the top layer; a gold on cream design as the middle layer (you can see an inch at the bottom), and an underskirt of white voile.
Cut your fabrics as follows:
Top layer: A x B
Middle layer: A x C
Underskirt: A x C (if you want it to show) or A x B (if you want it to be hidden).
Use pinking shears if you like.
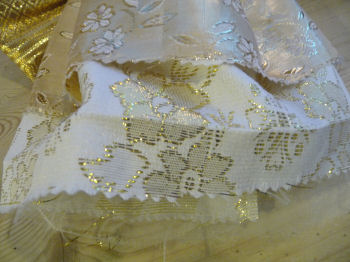
You can just see the underskirt peeping out here!
2. Stitching your dress
Layer the fabrics, right sides up, with the underskirt at the bottom, then the middle layer, then the top layer. Measurement A should lie along the top. Now thread a needle and knot one end of the thread carefully. Run a simple, fairly large running stitch about half an inch (one centimetre) down from the top edge, stitching through all three layers at once. Leaving the needle on, gather up the fabrics until they will fit around the neck of the wooden spoon. Put a small amount of glue on the neck of the spoon, then fit the fabric in place so that the opening runs down the spoon side of the spoon. Sew a few stitches to keep it in place.

The top edge of the three fabrics forms a pretty ruffle around the angel's neck.
3. Making the wings
Cut a 22 inch length of ribbon, fold in half and mark the centre point lightly with a pencil or a pin. Fold the edges in to the centre, but overlap them very slightly. Now gather together at the centre point and either stitch in place (neatest) or use an elastic band to secure. You can always cover the elastic band with another strip of ribbon if you like, but we left it as is.

4. Attaching the wings
Attach the wings to the back of the angel using stitches or a big dab of glue. The centre point should cover the opening at the back of the angel's dress.
5. The angel's hair
We made our angel's hair by cutting 5 inch lengths of gold ricrac braid and sticking it to the very top of the wooden spoon. We then topped the hair with a "ribbon" cut from one of our fabrics with pinking shears, and tied into a bow.

My angel, made with a 10 inch wooden spoon.
6. Add a face
Now all you need to do is give your angel a face! We used a black felt tip pen and a red colouring pencil for the cheeks.

Tilly's angel

Josh made this angel for Granny's Christmas tree.