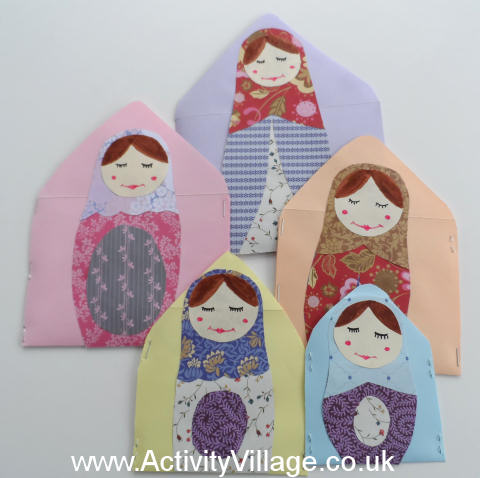
Sarah has come up with this very clever idea for a Matryoshka doll craft! Creating the dolls involves lots of cutting and sticking and drawing on of faces. Once done, "stack" the envelopes inside each other to store your pretty dolls safely.
You will need:
5 envelopes
Stapler
Gluestick
Flesh coloured paper
Scrapbook or patterned paper
Pens
Instructions:
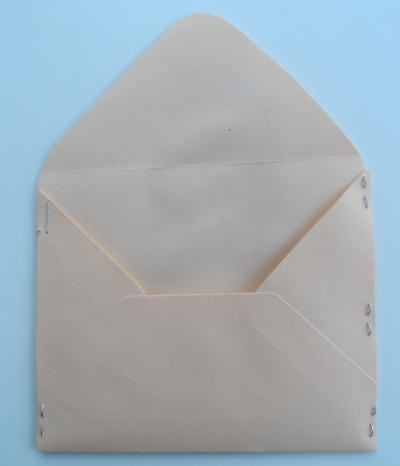
Open out the envelopes so the points stick up.
Put one envelope to the side.
Take a second envelope and trim a bit (about 8mm, or 1/3 inch) from each side of envelope and the point. Staple the sides closed. This will now slip inside the first envelope.
Trimming down the envelopes
Take a second envelope and trim 1.5cm or 2/3 inch from the sides and point, and again staple the sides closed. Repeat with the fourth and fifth envelopes, cutting off a bit more each time.
You should now have 5 envelopes that fit one inside the other.
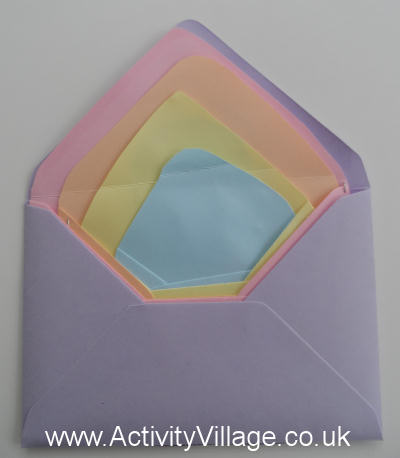
Five stacking envelopes
Now create your dolls! Cut circles from the flesh coloured paper for faces and decorate with the pens.
Cut shawls, bodies and tummy panels from the scrapbook paper, using our photos as inspiration.
Glue these pieces onto the front of the envelopes to make a doll on each envelope.
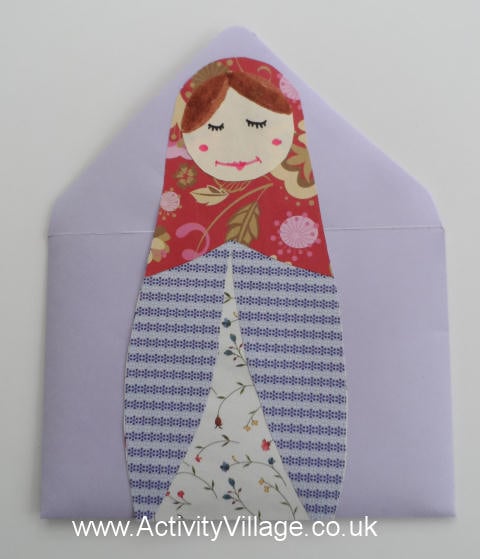
Pretty envelope Matryoshka doll!