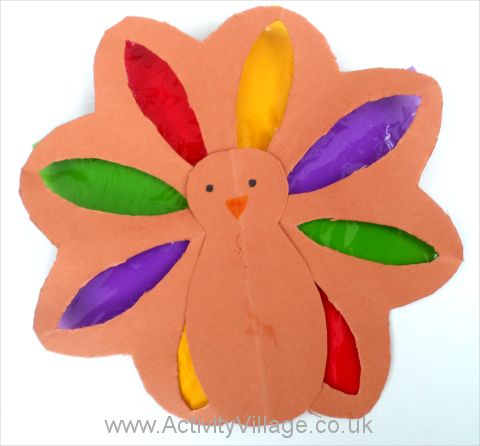
If you scroll down the page you can see how lovely this stained glass turkey craft looks displayed in the window! We've used festive colours for his stained glass feathers and the sun streaming through them looks really special.
You will need:
Sheet of brown card or paper
Cellaphane or tissue paper
Glue
Marker pens
Instructions:
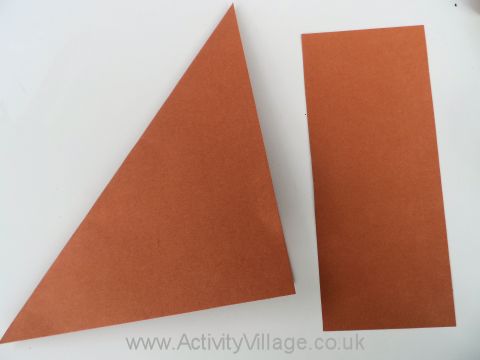
Fold one corner of the brown paper to the long edge. Trim along the straight edge. You will have a square of paper and a small rectangle. Put the small rectangle on the side for later.
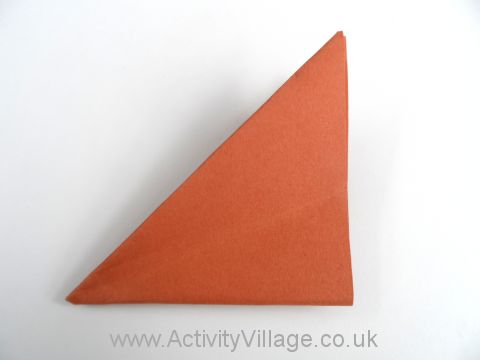
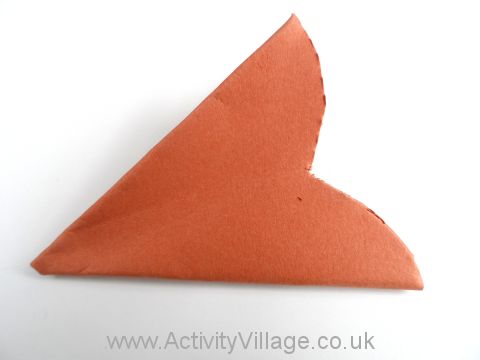
Fold the square in half diagonally and then in half again and in half a third time.
With the centre point to the bottom left, cut along the open edge so the folds form points. See our photograph below.
Now cut curves out of each fold, as in the photograph below.
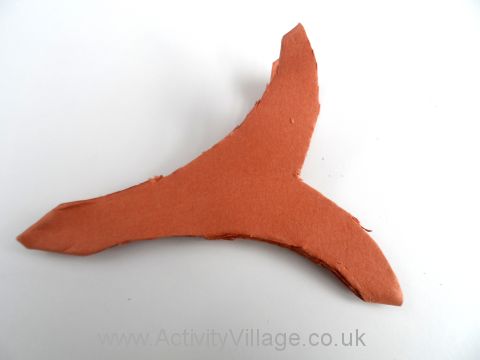
Open up the card. It should look something like this:
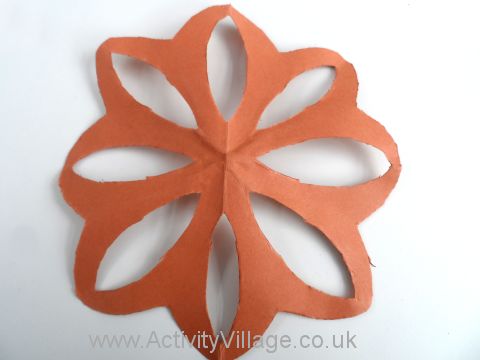
Glue a piece of tissue paper or cellaphane over each hole, trimming the extra bits off.
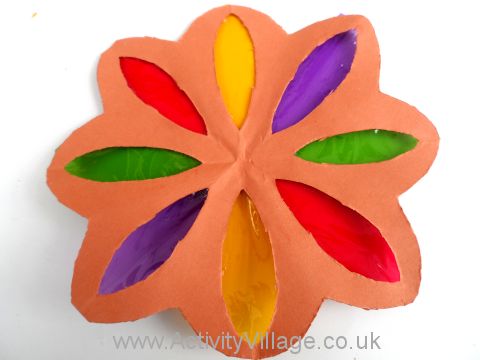
Using the spare card put on one side earlier, cut out a turkey body. Glue the body to the front of the stained glass tail. Draw on eyes and a beak.
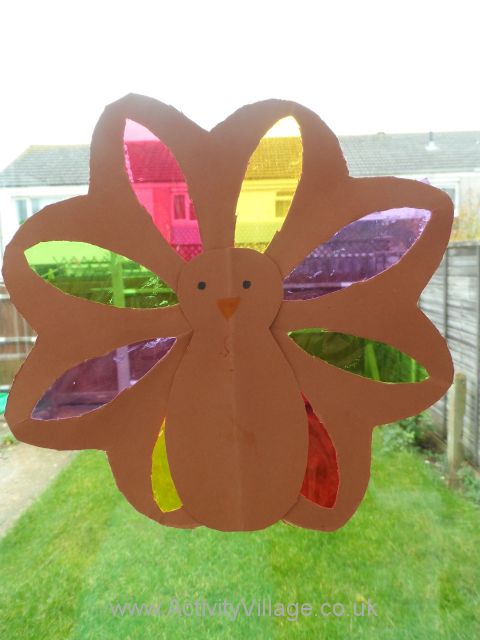
Our stained glass turkey displayed in the window!