This craft can be adapted to suit any age of child - even the youngest will enjoy sticking the tissue paper on and seeing the finished effect, although you will obviously have to do most of the cutting out yourself.

You will need:
Black construction paper or card
Scraps of tissue paper
Glue
Scissors
Instructions:
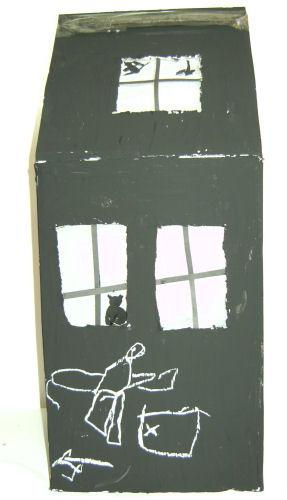
Use our Halloween templates for inspiration. The simplest idea is to use the pumpkin template to cut a pumpkin shape from black paper, then cut out the eyes, nose and mouth. The haunted house works well like this too.
Older children may like to design a framed picture. Take a rectangle of black construction paper and draw a Halloween picture onto it leaving a frame around the edge as well as "struts" in the middle to hold the picture together. Make your stained glass window as complex as you like!
Now you need to cover the cut-outs with the scraps of tissue paper, sticking them carefully with glue or sticky-tape to one side of the shape. The pumpkin looks great with orange tissue paper; the haunted house works with orange or yellow. For more complex designs you can layer strips of tissue paper to create a multi-coloured effect.
Attach your finished project to a window or glass door where the light will shine in from behind it.
NB: If you want to preserve your stained glass windows for next year, why not have them laminated or cover with clear contact paper?