Have some fun with this clever origami Olympic rings craft for kids - with help even the youngest children will be able to do it!
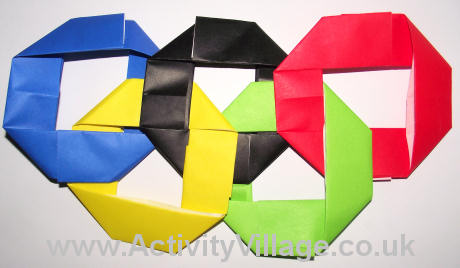
Our completed Olympic rings!
You will need:
- 6 inch square origami paper (or cut your own squares from standard paper) in red, green, black, blue and yellow
- Glue stick
Instructions:
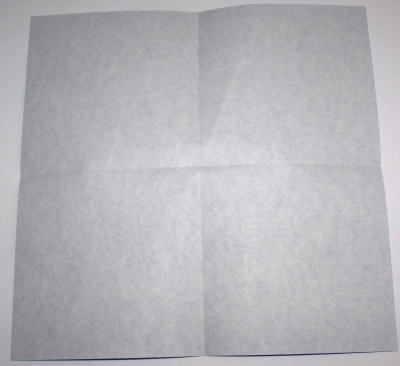
1. Take your red piece of paper. With your paper coloured side down, fold your square horizontally and then vertically to crease. (Yes, this is actually a blue piece of paper - sorry!)
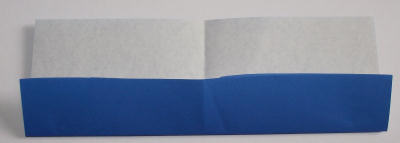
2. Cut carefully along one of the crease lines to make two rectangles.
3. You now need to fold each rectangle into thirds so that you end up with thin strips.
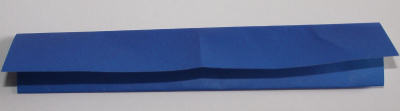
4. Carefully fold the two ends down and in at a 45 degree angle, creasing well. Repeat with the second rectangle.
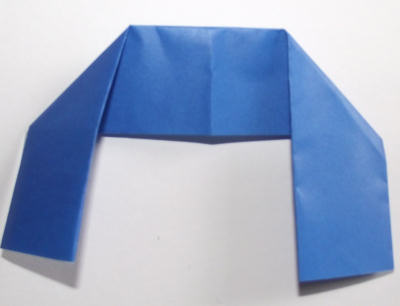
5. Slide the two parts of the ring together, pushing the ends of one inside the other. Use a glue stick to make the joins permanent.
Repeat steps 1-4 with the green paper. When you reach step 5, thread one of the ring parts through the red ring before joining the ends of the green ring so the are linked. Use a glue stick to stick the two rings together so they don't move about.
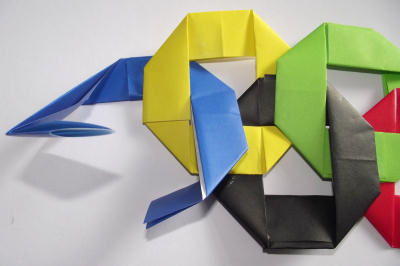
Repeat with the black, yellow and blue in turn, linking on to the previous ring.